Tuesday, August 31, 2010

welcome to my humble abode.

i am ready for my triumphant return to the blogosphere. hello, world. the past couple weeks have brought many new changes for me, including moving to a brand new town and living by myself for the very first time and starting grad school at IU. it's been a whirlwind thus far, and i'm not expecting things to slow down anytime soon.

i began nesting for my new apartment long before i moved in. i started preparing / collecting wall decor, rugs, curtains, lamps, and all kinds of things to make this little place feel like home. i figured it would help with all of the newness that is currently surrounding me.

i want to share some photos of my apartment. i think i would describe it as granny-meets-hippie-meets-fabric-store. if there are any items of interest, i will describe. enjoy my little tour!

living room (and gretta) :
curtains, lampshades, pillows, flowers in vase, and canvases made by me. rug from urban outfitters. couch from goodwill. lamps from favorite finds in carmel. coffee / end tables and shelves from target. quilt made by my grandma. table runner from my friends jessica & jessi's etsy shop, j. emporium. end table covers from world market.

lamp close-up:
i did a lampshade tutorial a while ago. this is my second finished product. i love the green base! green glass pressed flower art from nashville art/craft fair.

living room / dining area:
more fabric canvases / frames made by me. table from craigslist. table wall decor from goodwill / target / michael's. table rug from urban outfitters. 

close-up of table wall decor:

more living room:
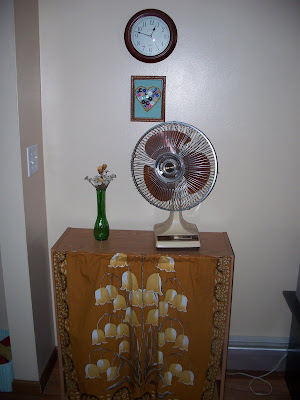
shelves, clock, and record box from target. shelf curtain and heart art made by me. wall shelf from nashville flea market. framed posters from my friend jessica (frames from goodwill & hobby lobby). fan from my parents. record player from the internetz.

secret craft corner:
i made this curtain to cover up my plastic drawers and bins full of craft supplies. the fabric is made from a thai kimono that my friend emily gave me. (her mom didn't want it!) my dad described this fan as my parents "first marriage fan." 29 years old and still going strong.

record area close-up:
jessica gave me these vintage post cards and original hatch show print poster as a gift when i moved from nashville. (band of horses on the player.)

behind-the door shelf:
(the things hanging from these hooks say a lot about me.) midwest is best bag from renegade handmade in chicago. helmet from nutcase in portland, oregon. 

dining area/kitchen:
green table coverings/cloth napkins from goodwill. breadbox from my old school. vase from goodwill. flowers made by me.

the view into the kitchen and hallway:
these two little ottomans (ottomen?) from target fit perfectly as counter seating. letter holder / key hanger from goodwill. tiny wall hanging in the left-hand corner from anthropologie.

kitchen:
lantern from anthropologie. flower hot pad from hobby lobby. patchwork oven mitt & hot pad from egypt (!). soap basket and towels from target. (the tiny owl on the oven was my mema's.)

above the kitchen sink:
the lantern and oven mitt are hanging from the cabinet knobs. framed owl fabric art made by me.

hallway:
dresser and picture frame from target. hanging shutter, table cover, and vases from goodwill. faux flowers from michael's.

bathroom:
shower curtain, towels, and rugs from target.

above the toilet:
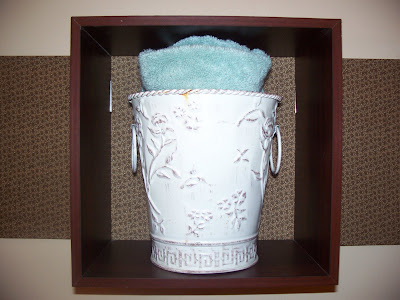
there was a gross metal shelf above the toilet that i decided had to go asap, but it left a big ugly unpainted spot. i covered it with fabric and this floating shelf, then added the bucket and towel as decoration.

above the toilet close-up:

sink area:
check out that crazy expandable mirror! soap dispenser from world market. cup from anthropologie. toothbrush holder from target.

bedroom:

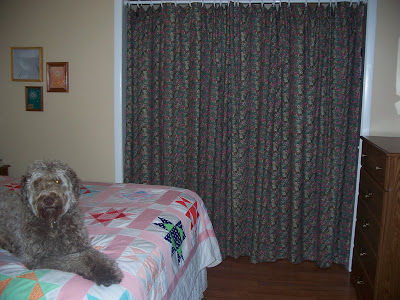
curtains (window and closet) made by me. quilt made by my grandma. shelves and dresser from target. mirror from goodwill. wall hooks from world market and urban outfitters. rug from urban outfitters.

dresser area close-up:
floral box from world market. wood/bronze box from southeastern salvage in nashville.

bed!
my grandma made this beautiful quilt! pillow cases, lights, lamp, tables, and dandelion decals from target. art above the light switch made by me.

bed wall close-up:
if only i had a sweet headboard! (please disregard the one light that doesn't work. oops.)

desk area:

desk from office depot. floating shelf from target. picture frames from goodwill. backpack from american apparel(!).

closet:
i'm proud to say that i dismantled my closet doors all by myself and rigged up these curtains. 21 yards of fabric, 12 shower curtain rings, and a 6 foot shower curtain rod = easy closet access. gretta is excited about it. (to the left is a little dandelion collage including one made by me (on the bottom).

and, of course, one more picture of gretta posing for the camera. she is such a diva!

my parents were skeptical that all of this furniture would fit into my 560 square foot apartment, but i managed to find a place for everything. the dresser in the hallway holds all of my fabric. the little dining table has drop leaves that open so i have a bigger area for crafts and sewing. i have a place for everything, and since i'm the only one who lives here, i got to call all the shots. it's been fun setting everything up and making it all homey. 

i have some hair treasures news and other fun things that i'll post soon. i hope to carve out a little time in the near future to make some new pieces. i'm feeling inspired. oh! there is an arts & crafts festival in bloomington this weekend, so maybe i'll see even more inspiring things! can't wait!

Friday, August 20, 2010

get outta town.

well, friends and lovers, it's time.

tomorrow i'm moving to a supercool town to start grad school. because i'm not bringing a tv (which, i'm sure, is the best decision, but i am already mourning the loss of the real housewives and project runway), it might give me a little extra time for hair treasures. i am hoping to get my etsy store stocked up and even have enough to (hopefully) participate in the bloomington handmade market. (vendors haven't been announced yet.)

i hope to post again in the next few days, but if i'm gone for a little bitty, just know that i am in the process of setting up my apartamento and making it all pretty. did that rhyme? yes, it did.

i will leave you with some of my current favorite tunes:

high violet (the national)
the suburbs (arcade fire)
infinite arms (band of horses)
the orchard (ra ra riot)
all delighted people (sufjan stevens)

enjoy!

Monday, August 16, 2010

trisha & tara's yard sale extravaganza spectacular.

since my sister trisha and i are both getting ready to move away (from our parents' house), we decided to hold our first annual (probably not-so-annual) yard sale extravaganza spectacular to make some extra dollars.

one of our many neon signs:

if you've ever organized a yard sale, you know it takes hours and hours of preparation and can sometimes be enough to make you feel like a crazy person.

challenges we faced: getting high on jumbo permanent markers while making signs, one of our dogs (briece) peeing on a pile of men's shirts for sale, crazy schedules that didn't allow for much preparation time together, and pesky early birds who arrived at 6:30 am instead of 7.

but despite the annoyances that come with organizing a sale, we had a great time and managed to make some money. sweet!

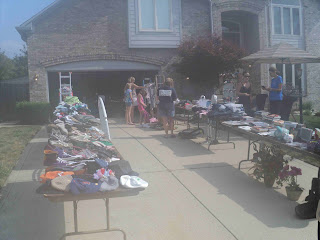
our driveway was packed with trash-turned-treasure, including clothes, shoes, home decor, books, records, and tons of random stuff that garage-salers live for:
(it's hard to see, but those ladders are supporting rods with TONS of clothes hanging on them. our dad is such a helpful harry -- he created some wooden supports for the rods so we could hang it all. he is a genius!)

it was in the high 90s but felt like it was 150 degrees outside. thankfully, our totally awesome dad rigged up this umbrella with dog chains and wooden stakes to shield us from the sun. what a guy!
(tara: thumbs up. trisha: get me out of here.)

in addition to all of our used items, i decided to set up a table of hair treasures. i'm so glad i did! a few people walked away with great hair accessories at discounted prices. one of our early bird customers even requested them by name (before i had them set up & displayed. . .)
(two of our neighbors, now proud hair treasures customers!)

discussing something important (and not complaining at all about the beastly temperatures) :

our paparazzi dad took this from inside the house. i spotted him despite his stealthy attempts at remaining unnoticed. (please note my wardrobe change. i was a sweaty betty!)
ps. my dad took all of these pictures. he has his own digital camera for work and busted it out so proudly to document our day. we continually referred to him as "#1 garage sale dad" all day.

here are some more pictures of our signs. one guy even said that our signs should win an award for the best ones ever! even though our sale took place on a sunday, we had tons of people shopping all day. maybe we should owe it to good marketing?

one of trisha's designs:

i kept it simple:

arrows are key. we actually put arrows on signs in our neighborhood, too, to help direct traffic.

we used open house signs from our mom's office (where i am a super fancy part-time receptionist). they worked out great because we didn't have to hammer them into the ground or tape them on random road signs.
we put our signs out at 1:30 am before our sale. for one, trisha dropped me off on a roundabout and drove in circles until i was finished positioning it perfectly. had to be there?

next time you do have your own sale, you should definitely:

*advertise it on craigslist: be sure to list specific items of interest and even attach pictures of your best items.

*mention it on facebook: you never know who might stop by! (one of the best parts of my day was seeing my friend jeri. we were booth neighbors at the castleton united methodist church craft show back in february!)

*make attractive signs: apparently you can tell a book by its cover -- it might even bring in unsuspecting customers. we used neon poster boards, bold lettering, and balloons (deflated in our photos - oopsies).

*try it on a sunday: we got multiple comments about sunday being the "new saturday" when it comes to garage sales. you never know!

now that i have all that extra stuff out of the way, i have no excuses for why i haven't started packing yet. the only one i can come up with is that i hate packing, which is obviously unacceptable. hopefully i'll find the motivation deep down inside -- and soon!

Wednesday, August 11, 2010

Craft Night '010 & an upholstered headboard tutorial.

i have definitely been going through a home decorating phase lately. there's so much to love about creating a space that is warm, cozy, and fits your personality. the best part of my most recent endeavors is that i've been able to make a little money go a long way. super!

this week i've been assisting some other people with their own home decor projects. my sister decided that she wanted a headboard for her bed. she's moving out soon and is redesigning her entire room. little did she know that she would start a fun trend amongst our friends!

here's trisha with her finished product: two thumbs up and one happy camper.

the first major step -- attaching batting to the plywood:
our first time around we bought two bags of quilt batting and glued them to the piece of plywood (66"x40" for a queen-sized bed). we used glue to conserve staples, but we ended up running out of staples anyway. to prevent a mess and save some time, just staple the batting instead. 

a close-up of trisha's fancy headboard:
to achieve the look of depth with the buttons, we just took measurements to place them, stapled each spot with the staple gun, and then hot glued the buttons on top.  it's super easy, and if you ever want to change the buttons, you can do it with just a little tug!

one of trisha's gem buttons:

if you're not familiar with upholstered headboards, take a look at some of these finished products i found on the internetz: #1  #2  #3  hopefully those give you a better idea of the look we are trying to achieve with our projects!

*     *     *

after hanging out with some of my pals, we decided to hold the first annual Craft Night '010 (that's oh-ten, everybody). headboards have become all the rage, and i couldn't wait to lend my skills to help create some more! the following photos and descriptions tell the tale of Craft Night '010 with a little tutorial in the mix. enjoy! 

obviously, no Craft Night is complete without cupcakes. my lovely guests came bearing 12 gourmet cupcakes from Gigi's. needless to say, we all woke up this morning with well-deserved sugar hangovers.
(starting with the neon girl, going counterclockwise: trisha, lauren, kris, hannah, and lindsay. patty and phil (my parents) and tyler (my brother) also made appearances and kept us thoroughly entertained throughout the evening.)

if you're not jealous, there is something wrong with you.

lauren and lindsay both wanted headboards, so we had to make a trip to lowe's for plywood.
1/2" plywood is great for this project. most hardware/home improvement stores will cut it down to size for you, too. your headboard should come out at least a couple inches from your bed on each side. it's really up to you, but we used 66" wide boards for 60" beds.

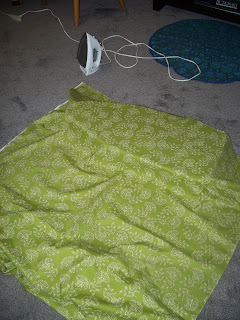
even if you're not a perfectionist, you should definitely not overlook ironing. make sure your fabric is nice and smooth before you do anything else.

trisha volunteered to do the irnoning. here she is with lindsay's chocolate brown satin fabric:
(she has talent, people.)

remember when i said you should staple the batting to the plywood? well, we got smart and used that technique at Craft Night. a hammer comes in handy when your staple gun is annoying, and the staples protrude a little too far (or you need to take out some aggression on your home decor project.)

here's another tip: buy your batting off the roll like this. we discovered that it's cheaper and easier! each board required two layers of batting to make them a little more plush, and each layer was 2 yards long. using this type of batting allows you to drape it over your entire board instead of placing it in rows like we did on trisha's.

after your batting is securely attached all the way around, you're ready for your fabric! just make sure there aren't any ripples or wrinkles. the best way to make sure that the fabric is pulled tightly is to work in teams like trisha and kris. one person pulls the fabric tight, and the other staples!

your headboard should start to look something like this on the back side:


a close-up of lauren's lime green floral print:

here's lauren's board with the batting and fabric securely stapled. the only things missing are buttons!

it's important to use a measuring tape to determine where your buttons will go. if you use our measurements for your plywood (66"x40"), your board will be split vertically into 16.5" sections and 13.3" sections horizontally. your buttons will go at the points where the lines would intersect in a grid pattern.

we used 6 buttons on each headboard. you can definitely use more or less if you want (or none at all!). if you choose to use buttons, remember that before you attach them, you need to put a staple in all the points you just measured out. it helps to utilize the batting in adding depth to your headboard.

then just hot glue your buttons on top of the staples, and you're all finished! lindsay went with traditional brown buttons.

one of lauren's mismatched bronze buttons:

another double thumbs up? can it be? i love a satisfied customer. lindsay's headboard will look great with her aqua / green / white / brown bedding!

this is lauren's best "check me out at the jersey shore!" pose. (be sure to catch her fist-pumping in a club near you.) her headboard will look so cute with her black and white tree tapestry bedspread!

we haven't tackled the issue of hanging the headboards yet, but we decided that attaching heavy duty sawtooth hangers would do the trick. or you could enlist the help of a frame-hanging genius and do it with wire. or get creative and hang it whichever way it works! that's usually the method i end up going with.

while most of us were focused on the headboards, hannah was diligently working on a gift for her friend and soon-to-be college roommate! inspired by a piece i did with embroidery and buttons, hannah decided to make an E for emily and fill it in with buttons. so cute!

hannah and lauren's mom, kris, brought a tin of vintage buttons with her. clearly, i was in heaven as i feasted my eyes on her abundant collection. hannah incorporated so many cute buttons into her design! this is a very time consuming project, so she took the majority of it home with her to finish later. craft star!

all in all, Craft Night '010 was a smashing success, complete with conversations about cellulite, bodily functions, stupid boys, and various other interesting topics. did i mention we had cupcakes? we had lots of cupcakes. in fact, here is the aftermath:


you are invited to the next annual Craft Night. what will be the next big trend? i don't know, but my crafty senses are already tingling! 

ps. let me know if you want any other info about our headboards! they really are a fun and easy way to brighten up your room and cozy up your bed. have fun!